
A well-structured wedding photography timeline is the single most important planning tool for capturing every moment you will want to remember. Without it, photographers rush, key shots get missed, and the day feels chaotic rather than joyful. Wedding photography timeline best practices centre on scheduling specific, realistic time blocks for each photo session, building in buffers, and sequencing everything around fixed anchors like your ceremony start and sunset. This guide breaks down exactly how to do that, with timing recommendations used by professional photographers and practical tips to keep your day running smoothly and your photos looking stunning.
1. What are the essential time blocks in a wedding photography timeline?
Industry standards recommend six core photography segments for a typical eight-hour coverage day. Each block has a recommended duration, and knowing these figures is your starting point for any photo schedule for weddings.
Here are the six essential blocks and their recommended durations:
- Getting ready and detail shots: 60–90 minutes. This covers the dress, rings, shoes, flowers, and candid moments with your bridal party. It is the most flexible block but also the most commonly underestimated.
- First look and couple portraits: 30–45 minutes. A first look before the ceremony frees up time later and produces relaxed, emotional images.
- Wedding party photos: 30–45 minutes. Group shots with bridesmaids and groomsmen work best immediately after the first look while everyone is still fresh and together.
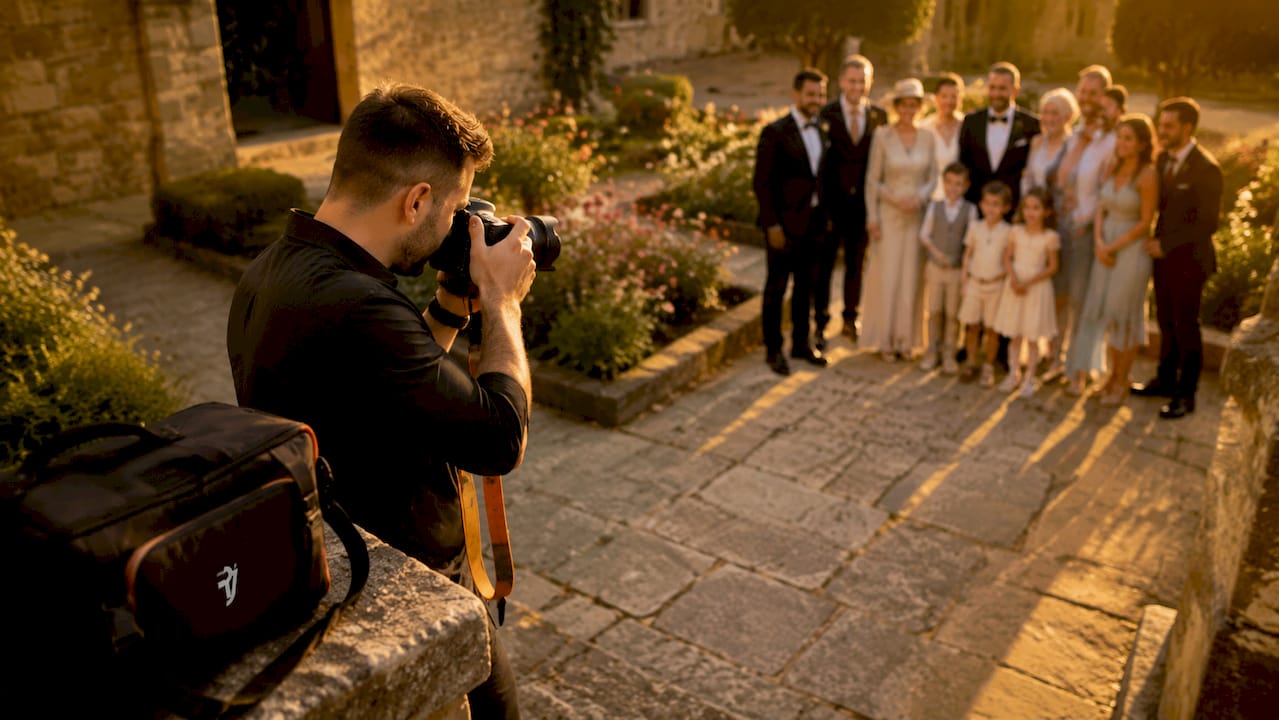
- Family formals: 30–60 minutes. The range depends on family size and complexity. Larger families with step-parents, grandparents, and blended groups need the full 60 minutes.
- Golden hour portraits: 20–30 minutes. This is the most visually rewarding block of the day. The soft, warm light in the 30–45 minutes before sunset produces portraits that are genuinely difficult to replicate at any other time.
- Reception coverage: Typically 3–4 hours, covering speeches, first dance, cake cutting, and candid moments throughout the evening.
Pro Tip: If you are skipping the first look, all your formal portraits shift to after the ceremony. That compresses cocktail hour coverage significantly, so plan your reception schedule with that in mind from the start.
2. Why building your timeline backward from fixed anchors ensures success
Building the timeline backward from fixed anchors is the most reliable method for wedding photo timeline planning. Most couples make the mistake of starting from when they wake up and working forward. That approach ignores the hard constraints that actually govern your day.
Your fixed anchors are:
- Ceremony start time. Everything before this is working backward from a deadline.
- Venue access time. When can your photographer actually arrive and begin shooting?
- Sunset time. This is non-negotiable. Golden hour waits for no one.
Here is how backward planning works in practice. Say your ceremony starts at 4:30 PM and your venue is 25 minutes from the getting-ready location. You need to leave by 4:00 PM. Before that, you need 15 minutes to gather everyone and load the cars. That puts your getting-ready finish time at 3:45 PM. Work backward from there to set your hair and makeup start time. Every block slots in with purpose, not guesswork.
“Ignoring fixed anchors is the most common reason wedding timelines collapse. When you plan backward, every decision has a reason behind it.”
Forward planning creates false confidence. Couples who plan forward often discover at 3:00 PM that they have scheduled 90 minutes of portraits into a 40-minute window. Backward planning surfaces those conflicts before the day arrives, not during it.
3. How to incorporate travel, transition, and buffer times
Buffers are not optional extras. They are the difference between a timeline that works and one that falls apart by lunchtime. Planning 5–10 minutes for on-site transitions and 10–20 minutes for travel between locations keeps your schedule realistic.
Common day-of delays that buffers absorb include:
- Makeup running 15–20 minutes over schedule (this happens at the majority of weddings)
- Gathering guests and family members for group shots
- Unexpected venue access issues or room changeovers
- Transport delays, particularly in city-centre venues or during peak traffic
Adding 15–30 minute buffers between major photo segments prevents a chain reaction where one delay pushes everything else back. Think of each buffer as an insurance policy. If you do not need it, you gain free time. If you do need it, you save your timeline.
The smartest way to add buffers without extending your whole day is to build them into existing blocks rather than adding standalone gaps. For example, schedule family formals for 60 minutes when you realistically need 45. That 15-minute buffer is invisible on paper but invaluable on the day.
Pro Tip: Share your timeline with your florist, hair and makeup artist, and wedding coordinator at least two weeks before the day. When everyone knows the photo schedule, they can flag conflicts before they become problems.
4. Best practices for managing family formals and group photos efficiently
Family formals cause the most delays of any photography segment. A numbered shot list and a dedicated family wrangler are the two tools that prevent this block from eating into the rest of your day.
Here is how to approach family formals efficiently:
- Create a numbered shot list in advance. Number each grouping (1. Bride with parents, 2. Groom with parents, 3. Both sets of parents together, and so on). Your photographer works through the list in order, and there is no confusion about what comes next.
- Assign a family wrangler for each side. This person knows the family, knows the names, and can physically locate people quickly. Delegating a family wrangler familiar with guests’ names on each side can save 20–30 minutes of searching and repositioning.
- Keep the list focused. Aim for 10–15 groupings maximum. Every additional grouping adds 3–5 minutes to the session.
| Group size | Recommended time |
|---|---|
| Up to 4 people | 3–5 minutes per grouping |
| 5–10 people | 5–8 minutes per grouping |
| 10+ people | 8–12 minutes per grouping |
| Full extended family | Allow 15–20 minutes as a single block |
The biggest pitfall in family formals is trying to include too many combinations. Prioritise the groupings that matter most to you and your parents. A tight list of 12 meaningful shots beats a sprawling list of 25 that leaves everyone exhausted and the timeline in ruins.
5. What timing strategies protect golden hour and getting ready shots
Two photography windows define the quality of your wedding album more than any others: the getting-ready sequence in the morning and golden hour portraits in the evening. Both are fragile. Both are worth protecting fiercely.
Hair and makeup should be complete at least 45–60 minutes before dressing begins. This buffer allows for touch-ups, unhurried detail shots of the dress and accessories, and genuine candid moments between you and your bridal party. When makeup runs to the last minute, those relaxed, authentic images simply do not happen. The morning rush shows in the photos.
Golden hour portraits are best captured in the 30–45 minutes before sunset. This window provides the warmest, most flattering light of the entire day. It is worth stepping away from cocktail hour for 20 minutes to make it happen. Most guests will not notice your brief absence, and the portraits you return with will be among the most treasured images from your wedding.
Pro Tip: Check the sunset time for your wedding date and location at least a month in advance. Build your entire evening schedule around protecting that golden hour window. Share the exact sunset time with your photographer and coordinator so everyone is aligned.
Communicating these priorities clearly to your wedding coordinator matters as much as scheduling them. If your coordinator does not know that golden hour portraits are non-negotiable, they may schedule speeches or cake cutting to begin at exactly the wrong moment. Write your priorities into the timeline document itself, not just in a separate conversation.
Avoiding common wedding photography mistakes often comes down to protecting these two windows. When they are lost, no amount of skill can fully recover the images that could have been.
Key takeaways
A realistic wedding photography timeline built around fixed anchors, proper buffers, and protected key windows is the foundation of a wedding album you will love for decades.
| Point | Details |
|---|---|
| Schedule six core blocks | Allocate specific durations for getting ready, first look, wedding party, formals, golden hour, and reception. |
| Plan backward from anchors | Work back from ceremony start and sunset to set realistic start times for every segment. |
| Build in buffers | Add 15–30 minutes between major segments and 10–20 minutes for travel to absorb real-world delays. |
| Protect golden hour | Block the 30–45 minutes before sunset for couple portraits and communicate this to your coordinator. |
| Use a shot list and wrangler | A numbered shot list and a dedicated family wrangler can save 20–30 minutes during family formals. |
Why I always start with the timeline, not the shot list
I have photographed weddings where the couple handed me a beautiful shot list but no timeline. By mid-afternoon, we were chasing light we had already lost and rushing through portraits that deserved 30 minutes of calm attention. The shot list told me what to capture. The missing timeline meant we never had the when sorted.
The couples whose weddings I remember most fondly are the ones who trusted the process and gave each moment room to breathe. When the getting-ready block has a proper 75 minutes, I can capture the quiet moments between a bride and her mum, the laughter with the bridesmaids, the tiny details that tell the full story of the morning. When golden hour is protected, I can take you somewhere beautiful and make portraits that genuinely move people.
My honest advice is this: treat your photography timeline as seriously as your seating plan. It shapes the entire day. A rushed timeline does not just affect the photos. It affects how you feel during the day, and that shows in every image. Give yourself the gift of a well-planned schedule, and the photos will reflect the joy and happiness you actually felt.
— Richard
Plan your wedding photography with Richardjarmy
If you are ready to create a wedding photography timeline that actually works, Richardjarmy is here to help from the very first conversation. Richard works with every couple before the day to build a realistic, personalised schedule that protects the moments that matter most to you.
From the getting-ready details to golden hour portraits, every block is planned with care and a genuine love of capturing happy, authentic moments. Take a look at the wedding photography services on offer, or browse the wedding gallery to see what a well-planned timeline looks like in practice. When you are ready to chat, Richard would love to hear about your day and start building something brilliant together.
FAQ
How long should a wedding photography timeline be?
A standard wedding photography timeline covers 8–10 hours, from getting ready through to the first hour of the reception. Shorter coverage of 6 hours works for smaller weddings with fewer locations.
What happens if we skip the first look?
Without a first look, all formal portraits shift to after the ceremony during cocktail hour. This compresses the schedule significantly and requires a stricter timeline and a proactive family wrangler to avoid delays.
How much buffer time should we add to our wedding day schedule?
Plan 15–30 minutes of buffer between major photo segments and 10–20 minutes for any travel between locations. These buffers absorb the real-world delays that affect almost every wedding day.
When should hair and makeup be finished?
Hair and makeup should be complete at least 45–60 minutes before dressing begins. This allows time for touch-ups, detail shots, and relaxed candid moments without rushing into the rest of the day.
How do we make family formals run faster?
Prepare a numbered shot list in advance and assign a family wrangler for each side of the family. This approach can save 20–30 minutes and keeps the session calm and organised for everyone involved.